Why not use DaVinci Resolve for Photo editing ?
For some time now, I've been looking into getting rid of that infamous pile of shit that Lightroom is (or should I say Adobe, Lightroom isn't so bad…). I'm really not comfortable paying for another overpriced subscription for software that hasn't evolved much since the 2010s and over which I don't really have control over what's happening under the hood. I can also feel that as I move deeper into color management, having complete technical control over the data offers real and non-negligible artistic maneuverability. Of course, it's much simpler and more straightforward to start up your favorite retouching app, throw in your photos, and start retouching. But hey! Why make it simple when you can make it complicated?
Well, the first reason would be the pride of completely getting rid of Adobe. Adobe is like that toxic person in your life who just drains your energy (but mostly money), but from whom you can’t completely split because you’re too comfortable where you are. So yeah, it takes a leap of faith, but in the end, it’s much more rewarding, as you get to go on your own artistic journey, and do it for free. Don’t get me wrong, I started on Adobe software. I can remember the excitement of opening After Effects or Photoshop for the first time, contemplating that infinite wonderland of possibilities, which it was at that time. But you grow up, and if, like me, you happen to be what we commonly call a nerd, you’re not satisfied with what you have now understood. You need something new, something you can disassemble and understand how it works. Curiosity is a rabbit hole.
I find that there’s a very pleasing sensation in searching back through the technical history of photography. It’s amazing to think that the founders of photography thought we could use photons to cause a chemical reaction to represent an image at a given point (well, that’s the only thing they had back in those days, though). As Spielberg said:
“Digital photography is a science and film photography is a chemical miracle”
Well, it’s actually also science, but we get the idea, Steve…
I totally get the argument that shooting film is a whole other experience. As Spielberg rightly points out, you never know what you'll really get, and I think that's the most exciting part of the process. One thing pushes another: push in one direction, and it might pop up somewhere you wouldn't have thought of, and that's what (among many things) contributes to the overall cinematic feeling of film. But do we want that "cinematic look"? You might say yes, others might say no.
I really encourage you to watch this video from Steve Yedlin's website. It has been a true epiphany for me about film vs. digital photography, and why this rivalry is actually pointless: https://www.yedlin.net/DisplayPrepDemo/DispPrep_v2_websize_20mbps.html
I like the so-called "cinematic look," but I found that it was rather hard to transpose to digital still photography in Lightroom, and I lacked the controls I'm used to in color grading. But what if we could use those tools? Instead of digital cinema material, we'd use digital still material. After all, cinema is just photos taken at 24 fps, isn't it?
And that leads me to the second reason: the degree of control.
Because when you get sliders called "Exposure," "Contrast," "Highlights," etc., what do they actually do to your image? It comes down to a question of trust: do you have enough faith in these closed and proprietary tools, or do you actually want to get your hands dirty and manipulate your image like a lab technician would have done back in the days?
Maybe it's because my mind works like this, and maybe yours does too, but being able to split each step of the processing into nodes over which we have complete control makes me feel better. Nodes are a cleaner way of working, where keeping things in order is key. But that's not the only reason; working with nodes allows you to combine them in elegant ways, thus breaking the linear retouching chain we've been trained with.
You might call me crazy or disagree with me, and that would be totally fine. Actually, I don't want you to throw away your workflow if:
You're comfortable with it and don't feel you're lacking something.
The results you get are satisfactory for you.
But, if you feel like you need something more, or you feel constraints, I encourage you to read the following.
The challenges:
Let's say you have a decent enough camera that will give you a RAW file of your image, whether it's a Sony, Panasonic, Nikon, etc.
The RAW files you get from it can't just simply be "imported" into Resolve, since this software has been designed to work with video containers. You might argue that Resolve can indeed take RAW inputs, from RED for example, with R3D files. And even if this container is indeed a RAW container, its primary function is to store image sequences, not still images (even though it could). What happens under the hood is that Blackmagic software engineers got access to the R3D Development Kit from RED, which is accessible here if you're interested, and implemented a decoder inside Resolve using this SDK. Theoretically, they could implement support for still RAW containers, like .ARW from Sony or .RW2 from Panasonic, but I don't think this is a primary concern for them, since their customer base and software don't typically include photographers and their needs.
So, we have our first problem here: how to import the data into Resolve? And it seems that we have two options here:
Beg for the Blackmagic SDK and make complete integration of still RAW files ourselves -> Very hard, if not impossible.
Convert the RAW container into a more Resolve-friendly, image-based container -> More doable.
You might have noticed that I used the term "image-based container," and this is for a good reason. Because RAW files, as their name implies, represent the value that each photosite of the sensor recorded during exposure, not a fully formed image. Since we have no way to directly measure the spectral distribution (color) of a light hitting a photosite, engineers had to find a trick. An RGB Color Filter Array (CFA) has been placed in front of the sensor, thus the value of each photosite will vary depending on what color its filter was. The filter arrangement usually follows a Bayer pattern you might be familiar with. Since human vision is pretty bad at discerning small differences of color, by averaging neighbors' known color values, we're able to reconstruct a pretty good approximation of what color hit each photosite. This step is known as demosaicing, after which, with some additional processing, we have a scene-referred image.
Any professional image container could do the trick, as long as we have enough bit depth and no lossy compression.
But here comes the second problem: how to make sure that we keep all the dynamic range of the image after demosaicing it? In other words, how to store the sensor data and how to interpret the values it created into a given color space?
Most of the RAWs produced by modern cameras often store in their metadata the information required by the converter to go from RAW data to a given color space. As long as this color space is wide enough, no loss of information will occur, and we will be able to interpret this image as scene-referred as we would with any regular footage.
The Workflow:
The resulting workflow is actually straightforward:

In the example below, I used my Panasonic S5 .rw2 files, but it should work with any RAW container.
There are a number of RAW converters, but since I want to automate this workflow in the future, I needed something that can easily be called in a program. But remember, you can use the one you want, as long as you're not degrading your data.
I'm using LibRaw, which seems to be the most adopted solution in the industry. It uses the TIFF container as an output, and even if it's not optimized, it works just fine with Resolve. I'll be using ACES primaries for the destination color space and keep the linear data from the demosaicing result.
dcraw_emu -disars -6 -W -g 1 1 -o 6 -T _MC_5591.rw2
dcraw_emu is the emulation of the dcraw system from which LibRaw emerged.
-disars: This option disables the RawSpeed library (you might not need this option, but it caused issues when I used it on my side).-6: Enables 16-bit output writing.-W: To not automatically brighten the image.-g 1 1: Sets the gamma to 1 with a slope also at 1.-o 6: Sets the output color space to ACES (AP1 primaries, I suppose?).-T: .tiff output._MC_5591.rw2: Input file.
This command produces a TIFF image file named MC_5591.rw2.tiff, with demosaicized data mapped to ACES primaries according to the camera response (stored as a 3x3 matrix in the metadata) and keeps the values linear (doesn't apply a gamma curve).
The next part is easy; we just have to import this image into Resolve and interpret it properly.
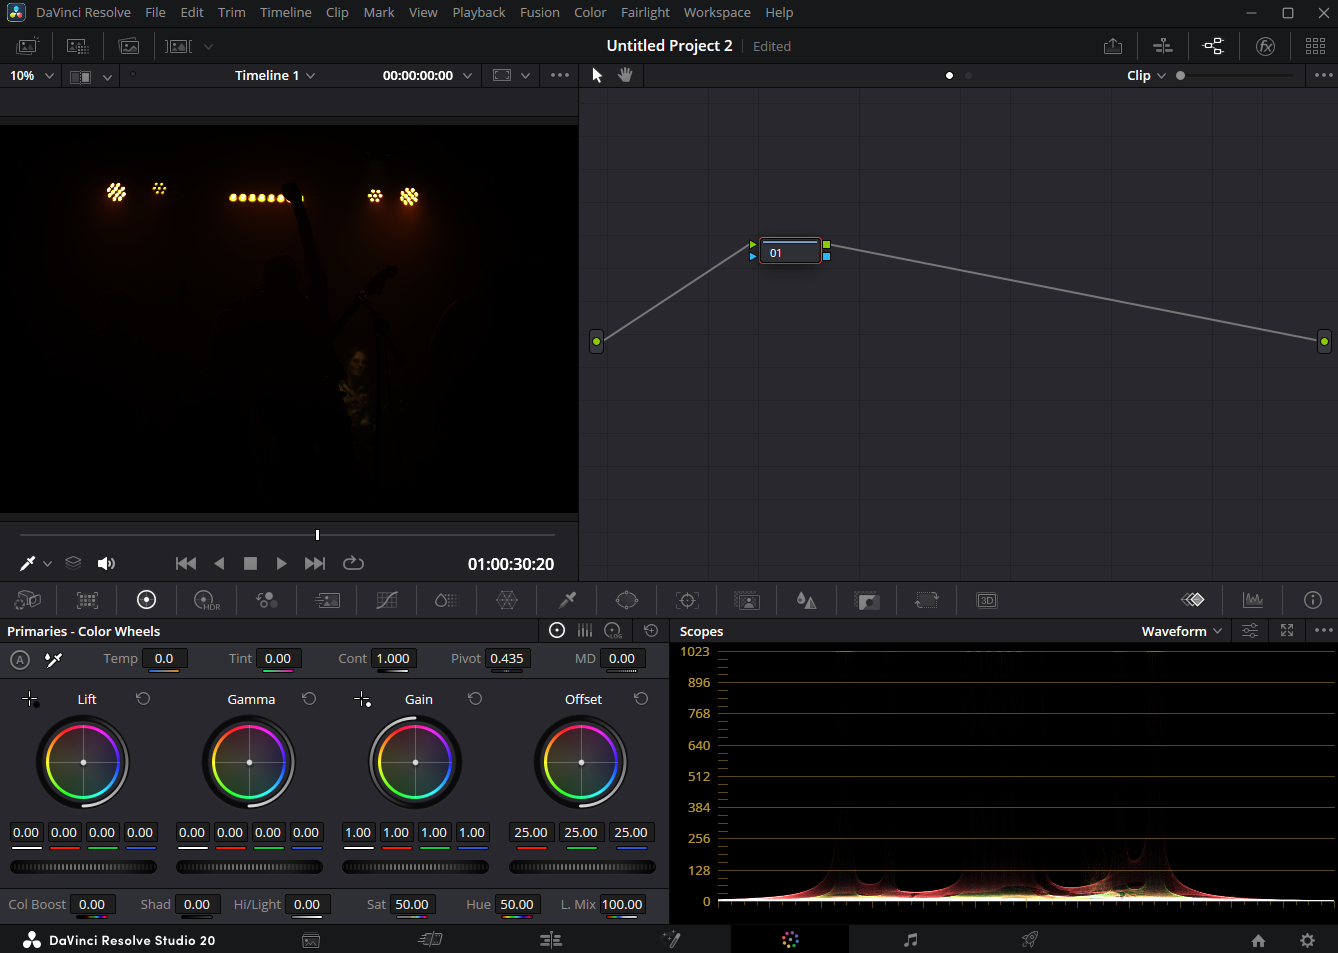
Uninterpreted image inside of Color page, as you can see, it looks like shit, and it’s supposed to !
Now, you're free to choose the color management pipeline that best fits your needs. I'll use a Color Space Transform (CST) as the Input Device Transform (IDT) and OpenDRT inside a DCTL as my Display Rendering Transform (DRT). If you want to know more about OpenDRT, check its GitHub page.
You can, of course, use another CST as your DRT or use Resolve's built-in color management for IDT and DRT. As we were discussing film rendition earlier, you can also use a film emulation plugin, such as Genesis, for instance, to get closer to the response of film.


You might notice that the image is still very dark. And no, it's not because of my inability to use a camera, but remember the -W option in the command, which told dcraw not to automatically adapt brightness.
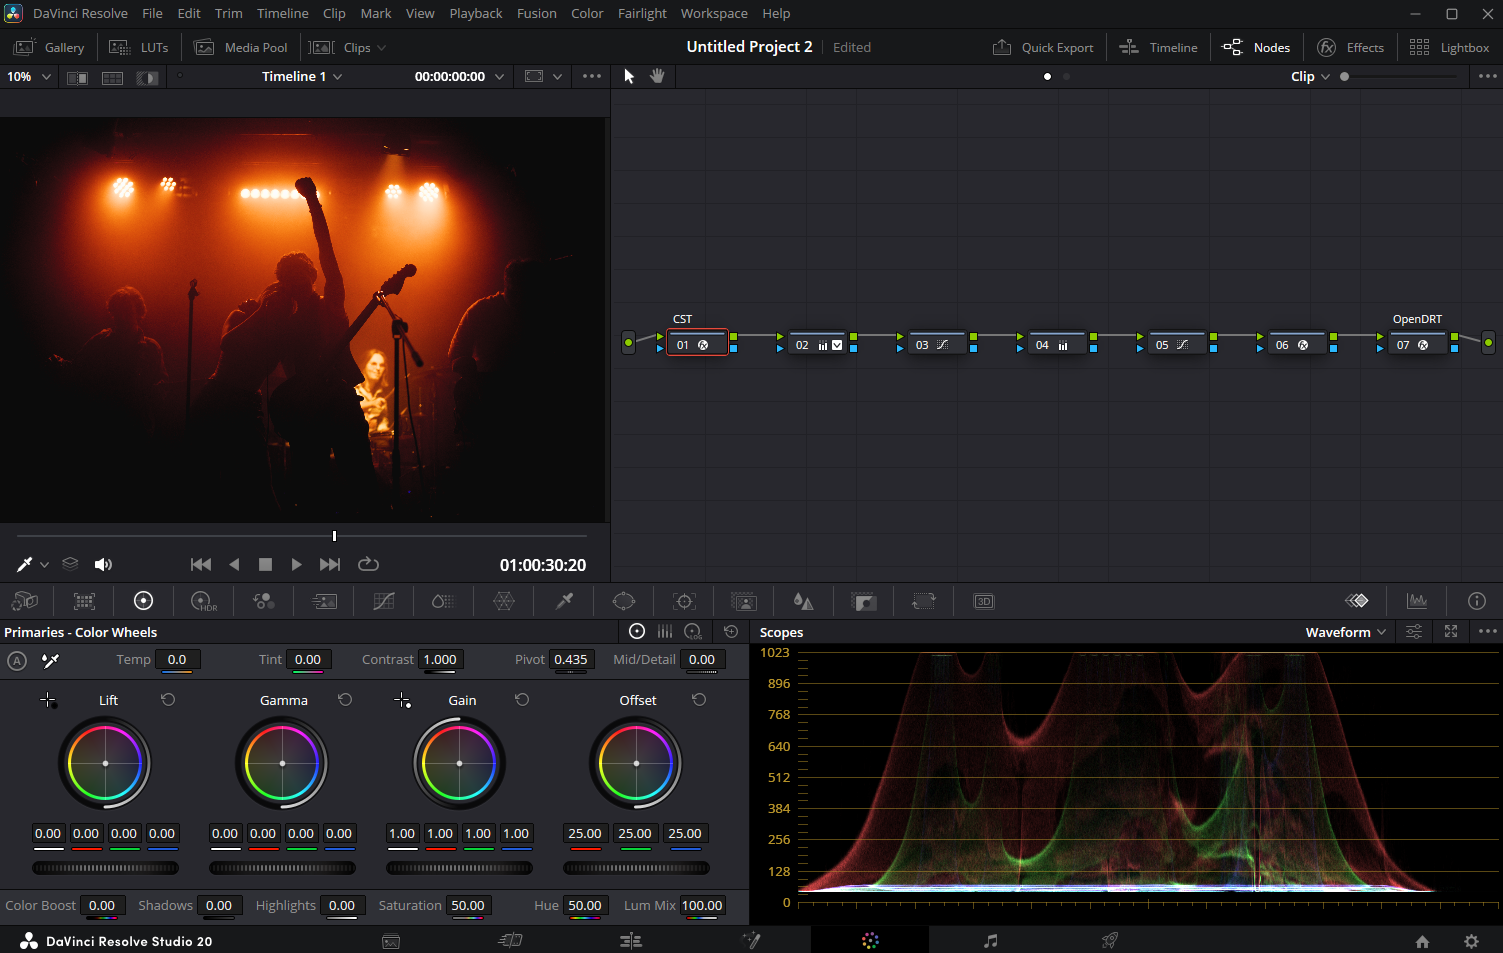
Now you have access to all of Resolve capabilities, you can apply you color-grading knowledge as you normally would !
You’re all set ! It’s up to you now to make your photos look amazing !
Thanks for reading !